The 10 Durability and Cleaning Tests to Run on Vegan Trainers Before You Buy
Vegan trainers promise ethical materials, but looks and labels do not guarantee durability or easy care. Before you buy, check whether they crease, scuff, discolour, trap odour, or fall apart prematurely.
This guide sets out ten practical durability and cleaning tests for trainers. It covers material verification, seam and construction checks, abrasion and traction trials, stain and water resistance assessments, and cleaning and drying trials, so you can see how pairs perform in everyday use. Work through these checks to identify weak construction, assess cleaning and repair options, and compare warranties before you commit.

1. Confirm material composition, sustainability claims, and recognised certifications
Read the full material breakdown, and ask the retailer for technical data sheets (TDS) or material safety data sheets (MSDS). Request composition percentages rather than vague labels. Note any named raw materials — polyurethane, microfibre, recycled PET, or plant-based leather — and compare them using known surface, breathability, and abrasion characteristics. Verify vegan trademarks, chemical-safety certificates, and recycled-content certificates against the issuer's registry, because certificate numbers show exactly which components are covered and whether animal-derived adhesives or trims are excluded.
To verify a vegan or recycled claim for trainers or sneakers, use practical, evidence-based checks. Request a bill of materials that lists zips, threads, foam and glue, and ask suppliers whether adhesives and dyes were tested for animal-derived proteins. Retain written confirmations, Certificates of Analysis, or independent test results where possible. Insist on chain-of-custody documentation, supplier names, country of origin, and any factory or audit reports to verify recycled or plant-based claims. Those documents let you trace materials through production and spot gaps in certification. Carry out simple in-person checks too. Place a small drop of water on the upper to see whether it beads or soaks in. Flex the shoe to expose internal layers, and inspect seams and edges to distinguish coated sheets from woven fibre or microfibre. These tactile and visual tests can reveal hidden materials or construction choices that paperwork alone might miss. Compare what you see on the product with the traceability evidence. That combined approach lets you judge whether labelled materials were actually used throughout production, and whether small components, such as glues, threads or trims, might undermine the vegan claim.
Opt for certified recycled fleece to verify sustainable claims.

2. Inspect seams for strength and overall construction integrity
Begin with a close visual and tactile inspection of all external stitching. Look for even stitch length, consistent tension, no skipped stitches, and no loose thread tails. Run your finger along each seam to feel for lumps or irregularities, since uneven stitching concentrates stress and commonly leads to seam failure. Use a torch or your phone torch to inspect the inside of the shoe and reveal seam allowances and raw edges. Confirm raw fabric is folded, taped, or overlocked rather than left exposed. Exposed edges or fraying fibres indicate a higher risk of the seam unravelling with wear.
Do a flex test on the sneaker at two stress points: the toe box (front) and the heel counter (back). Bend the shoe several times and watch seam lines and glued joints. If seams widen, fibres blanch, or any separation appears after only a few bends, the construction may not tolerate repeated movement. Inspect reinforcement where the upper meets strain points. Look for backstitching, bartacks, double rows of stitching, or overlapping panels at eyelets, toe caps, and the heel. Note the neatness of these details: even, well-placed reinforcement distributes load and slows seam wear. Finally, check the bond between the upper and the sole. A clean, even adhesive line without gaps or excess squeeze-out is a good sign. Try a gentle peel at the sole edge; a consistent glue bead and no early delamination when flexed indicate controlled bonding.
Add cushioned socks to reduce friction and extend wear

3. How to assess flexibility and midsole resilience in trainers
Start with a bend-and-roll test. Hold the heel in one hand and the forefoot in the other, then flex the trainer into a natural walking roll. Note where it bends, whether the upper and midsole compress evenly, whether creases form, and whether the flex point aligns with the ball of the foot. Next, do a heel-squeeze rebound check. Press the midsole firmly with your thumb, then release. Watch how completely, and how quickly, the foam returns to shape. A shallow, rapid recovery indicates resilient foam; a deep or slow rebound points to potential premature compression. Finally, repeat compressions on the same spot several times and inspect for permanent indentations, loss of spring, or visible creasing. Persistent deformation after repeated loads predicts reduced long-term cushioning.
Check torsional rigidity by gripping the heel in one hand and the toe box in the other, then twist them in opposite directions. High resistance typically indicates better lateral stability, while low resistance allows freer forefoot motion but can lead to quicker fatigue. Inspect the midsole, glue lines, and seams for weak bonding, uneven joins, or visible separation. If you can, lightly dampen the midsole and upper, then repeat the flex and compression tests to reveal delamination or changes in flexibility when wet. Combine these observations — torsional resistance, construction integrity, and wet behaviour — to judge how the trainer will cope with repeated loads, side-to-side forces, and moisture, rather than relying on comfort alone.
Wear a mid-weight crew for post-test cool-downs.

4. Simulate real-world wear to test outsole traction
To assess a trainer's durability and grip, run three simple, documented tests and compare the results. 1. Abrasion test - Drag the trainer across coarse concrete with steady, even pressure for several paces. Photograph the sole before and after, then inspect for tread smoothing, chunking, or exposed layers. 2. Wet-surface traction - Walk, make controlled turns, and perform deliberate stops on a wet tile or painted surface. Repeat both heel-first and forefoot landings to identify which contact areas lose grip first. Note any slips or changes in confidence underfoot. 3. Flex and bond test - Repeatedly flex the forefoot and heel to provoke cracking or delamination. Feel for changing stiffness, listen for separation noises, and check whether grooves open or collapse. Record photos and brief notes for each test so you can compare wear patterns and make evidence-based judgements about construction and performance.
Compare traction behaviour of trainers on contaminated surfaces by applying a light film of oil to tile and a dust layer to concrete. Measure slippage and stopping distance to determine whether the tread sheds debris or clogs and becomes slippery. Record objective indicators such as initial and post-test tread depth, visible glazing, and pattern deformation, and photograph changes to document wear progression. Correlate those signs with the sole compound and tread geometry to infer long-term traction potential. Use the combined results to identify which contact zones and compounds are most likely to lose grip in real-world conditions.
Stay mobile and comfortable during tests.

5. Test scuff and abrasion resistance on your trainers
Perform a visible scuff test. Choose a hidden panel or the toe box, press a coin or key into the material with steady pressure, and make a set number of strokes, for example 10 in the same direction. Photograph the area before and after, then blot the test site with a white cotton cloth to reveal any colour transfer or permanent marking. To simulate longer-term wear, run an abrasive cloth or fine-grit sandpaper (around 400 to 600 grit) over a spare area or inside the tongue for a consistent number of passes, such as 10 to 15, then inspect for fibre lift, finish removal, or surface roughening. Finally, stress high-friction zones by repeatedly flexing and rubbing the toe box and heel collar while applying light pressure with a soft brush or cloth. Photograph any creasing, cracking, or coating failure for direct comparison. Keep test locations, pressure, and pass counts consistent so you can objectively compare results.
Test edge and midsole resistance by running the outsole or midsole edge firmly across concrete or a coarse paving slab. Note how much material transfers to the surface, and whether the sole loses shape or traction. Create a deliberate scuff, then treat separate spots with common cleaning routines: a dry rub, a soft brush with water, and a gentle soap solution. Photograph each stage to document recoverability. Record which methods remove marks without changing colour or texture, so you can judge how easily the trainer will restore after everyday knocks on the high street.
Wear resilient garment‑dyed joggers for comfortable testing.

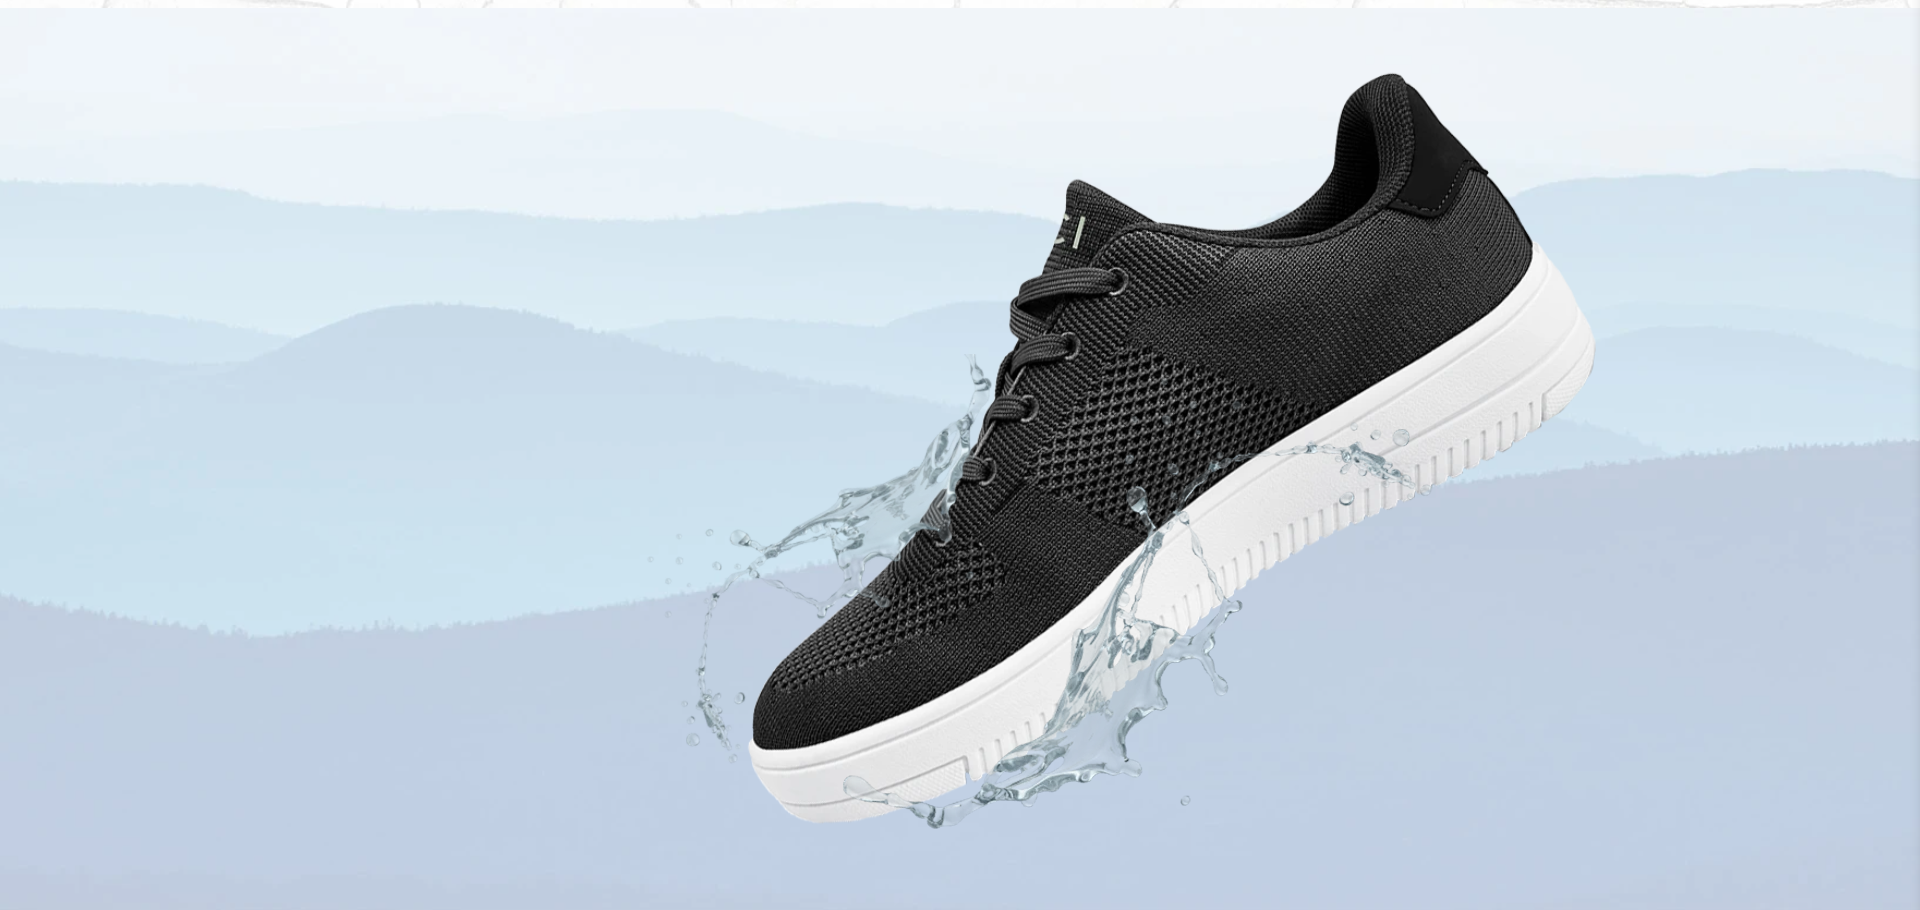
6. Assess water repellence and breathability for everyday sneakers
Perform a water-bead test: sprinkle droplets across several areas of the upper and observe whether they bead and roll, sit on the surface, or soak in. Press each area afterwards to check for moisture migrating into the lining. Recreate a wet-foot scenario by wearing a lightweight, damp liner and walking indoors for a few minutes, then inspect both the liner and the trainer lining for transferred moisture and trapped warmth. Together, these checks indicate where moisture collects, whether a hydrophobic finish repels surface water, and how the trainer handles sweat and light rain.
Examine labels and construction for objective clues, such as water-repellent claims, waterproof membranes, sealed seams, taped stitching, tongue gusseting, and seam sealing. Note that a membrane or sealed seams usually block liquid but can limit moisture vapour escape. Do a simple airflow test by blowing into the toe box or cupping the shoe while you exhale, and visually check for open knit, mesh panels, or perforations that indicate higher breathability. Visible vents and mesh generally correlate with airflow, even if they reduce water resistance. Finally, read the care label, clean a small test area, then repeat the water-bead and internal dampness checks before and after applying a suitable reproofing product to compare performance and observe how coatings wear with routine maintenance.
Wear mid-weight joggers when testing and drying trainers

7. Verify stain resistance and colourfastness for long-lasting trainers
Dampen a white cotton cloth and rub a concealed area, such as the inner tongue or under the heel. Check the cloth for dye transfer to reveal any immediate bleeding when the material gets wet. Apply a small amount of mild soap to a hidden patch, blot with a clean white cloth, then compare the material and the cloth to see whether cleaning spreads, lifts, or removes marks. Photograph the trainers in natural light, flex the upper, rub high-contact areas, and compare before and after images to spot fading, patchiness, or finish changes caused by wear.
Check the upper material and any surface treatments first, because woven textiles, leather alternatives, and coated synthetics behave differently when stained and cleaned. Follow the care label, then wash a removable component or a small swatch according to those instructions. Inspect and log any colour loss or transfer onto white fabric. Photograph the swatch before and after testing, and combine those images with your notes to build a realistic picture of how the trainers will age with routine cleaning.
Test colourfastness with a garment‑dyed cotton tee.

8. Test cleaning methods and observe drying behaviour
Start by checking colourfastness and finish on a concealed panel of your trainers. Dampen a clean white cloth with your chosen cleaner, rub a hidden seam or the tongue lining, then inspect both the cloth and the material for dye transfer, finish dulling, or fibre pilling. Next, simulate everyday stains in steps: begin with dry brushing, move to a soft brush or cloth, then try gentle spot-cleaning. After each step, look for residual marks, nap flattening, seam weakening, or softening at the sole edge. Comparing how well a product removes soiling against any visible damage tells you which cleaners and methods are safe to use on the main upper.
To assess water absorption and drying effects on sneakers, use a repeatable, documented procedure so you can compare results objectively. Lightly mist the upper and inner lining, blot excess moisture with a cloth, then pack the shoe with absorbent material to simulate internal wetness. Observe and record how quickly moisture wicks away, whether the shoe loses or holds its shape, and whether a musty odour develops as it dries. Trial different drying methods — air drying with internal support, pat-drying with a towel, and gentle airflow — and note which preserves shape, flexibility, and surface texture best. For each method, record any stiffness, shrinkage, crazing, or exaggerated creasing it produces. Repeat clean-and-dry cycles on a small, inconspicuous area and document before-and-after appearance and smell to reveal cumulative effects, including colour fade, loss of water repellency, sole delamination, persistent staining, or permanent texture change. Photograph each stage, log timing and environmental conditions, and keep your notes consistent so you can draw clear comparisons.
Use breathable, machine‑washable layers while testing and drying shoes

9. Evaluate odour control and microbial resistance in your sneakers
To test whether an antimicrobial claim on trainers is genuine, run a few simple, evidence-led checks you can repeat at home. 1. Simulate wear, then clean: Lightly dampen the inner lining and insole with saline or a short-wear sweat sample, and let the shoes dry naturally. Note the odour intensity before you clean them. Perform a routine clean and airing according to the care instructions, then reassess the odour. If a strong smell returns quickly after cleaning, microbial control is likely superficial. 2. Isolate and test the insoles: Remove the insoles and wash or soak them following the manufacturer’s guidance. Compare odour, texture, and any discolouration between the washed insoles and the original lining. If washable insoles regain a neutral smell, they offer a practical way to manage microbial build-up. 3. Check for masking agents and real actives: Sniff new trainers for strong perfumes that could be hiding odour. Read care labels and packaging for named active agents rather than vague claims. To test surface coatings, rub a small, discreet area of the lining with an alcohol wipe or launder as instructed, then reassess the odour. If the smell disappears after these actions, the product may rely on masking fragrances instead of genuine antimicrobial action.
Measure microbial load by swabbing the insole and lining with a sterile swab before and after a wear-clean cycle. Plate each swab using an at-home growth plate kit or send samples to a laboratory for quantitative colony counts and visible growth patterns. Compare before-and-after counts: persistent or rising colonies after cleaning point to a residual microbial reservoir rather than a temporary surface treatment. Check moisture management by spraying a small, controlled amount of water onto the inner lining, then pressing a clean tissue against the area to see how much dampness it retains. Inspect seams, padding, and lining fabrics for areas that hold moisture, especially where the foot sits in trainers, sneakers, or high tops. Materials and construction that trap moisture will predict greater microbial growth and odour risk over time. Contextualise any antifungal or antibacterial claim with material construction and ventilation. Poor breathability, not just the absence of chemical treatments, often drives odour and microbial growth, so a claimed treatment can be cosmetic if the shoe lacks adequate airflow. Together, these simple, reproducible checks give you objective evidence to judge whether odour control is likely to be durable or merely temporary.
Wear washable, breathable joggers to reduce trapped moisture.

10. Check repairability, warranty, and care options for your trainers
When assessing sneakers or trainers for repairability, inspect the construction for repair-friendly features: replaceable insoles, stitched seams rather than fully glued joints, visible panel joins, and a distinct heel counter. Photograph areas that appear bonded so you can judge whether a cobbler could open and reattach components, or whether full replacement parts would be required. Ask retailers and manufacturers about spare parts and repair pathways. Specifically, confirm whether they supply replacement soles, uppers, insoles, or laces, whether they offer mail-in repairs, and whether they list authorised repair partners or publish repair guides. Record concrete evidence: note whether parts are listed on a website, whether a mail-in service is described, or whether repair partners are named.
Read the warranty terms carefully. Identify the warranty's definition of a manufacturing defect, any explicit exclusions for wear or misuse, the remedies offered, such as repair or replacement, and any registration or proof-of-purchase requirements that keep cover valid. Test the manufacturer's care instructions on a concealed area of the trainer, sneaker, or high top before cleaning the whole shoe. Follow the labelled method, then check for colourfastness, loss of finish, and reduced flexibility. Supplement manufacturer guidance with consumer reviews and a conversation with a local cobbler about how they work with vegan and synthetic materials. Confirm that common repair adhesives and supplies compatible with synthetic uppers are available locally, as this independent evidence helps demonstrate real-world repairability.
Vegan trainers may look alike on the shelf, but they perform very differently in real-world tests. Running ten checks, including verifying material data sheets and stitching, flexing the midsole, and performing a water bead test, produces measurable evidence of how a pair will crease, scuff, wick moisture, or respond to cleaning.
Before cleaning your trainers, photograph the results, keep the labels and supplier confirmations, and test a concealed patch. That lets you compare traction, stain resistance, odour control, and repairability objectively. Use that evidence to weigh warranties, maintenance routines, and repair pathways, and choose the pair whose documented performance suits your high street wear and care habits.
